Get in Touch

How to set your Shipping Rates by Zip Code in Shopify

When we launched our first Shopify store I thought it would be easy to setup shipping rates by zip code or county. Unfortunately Shopify only lets you set shipping rates by state with their default pricing plan. Our initial workaround was to give customers a coupon code for free shipping. As long as they entered the coupon code upon checkout they received free shipping for their items. In year 1 for Seattle-Cedar.com this worked out just fine as we only shipped to primarily King and Snohomish counties and most of our customers were able to figure out how to get free shipping.

We are entering year 2 of our online store and the goal is to expand our shipping footprint. However, we knew that using the coupon code to give free shipping to our customers wasn’t going to scale. There are 2 main problems:

  • If you use the coupon code for free shipping then customers can’t use additional coupon codes (Shopify only allows one coupon code to be used per order)
  • Using the coupon code for free shipping is a bit clunky, customers expect to receive free shipping in certain areas and don’t want to be bothered entering in a coupon

We knew there had to be a better way, so the first option was to call Shopify and ask for help. When we called up Shopify, they let us know that if we paid our entire monthly charge 1 year in advance they would give us the carrier calculated shipping feature in our account. This feature is mandatory if you are using UPS, Fed Ex or other third party shippers to deliver your product. We do our own shipments at Seattle Cedar, so we didn’t need this feature to calculate 3rd party shipping rates, but we did need the ability to set prices by zip code.

NOTE: If you don’t get the answer you are looking for the first time you call Shopify try again. It took us 3 different calls to support before they offered us the option to pay the annual fee, get carrier calculated shipping and then sign up for the Better Shipping app.

Better Shipping App

Now that we had carrier calculated shipping enabled Shopify suggested that we purchase the Better Shipping app to allow us to set pricing by zip code. The Better Shipping app is pretty much a must have for companies that want to set discrete shipping prices, and works great if you need any of the following:

  • Needs to set individual shipping prices for every product
  • Needs to set tiered (multiple) shipping prices for every product
  • Has multiple drop shipping suppliers who charge different shipping rates
  • Needs to charge additional postage amounts to specific areas and locations
  • Needs to restrict postage to ONLY specific locations
  • Or if you want the flexibility and availability to take full control over your Shopify shipping

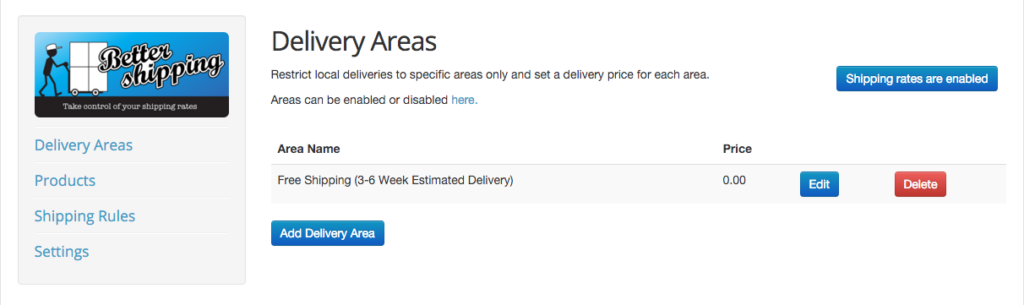
Within the Better Shipping app you will want to fill out “Delivery Areas” and include the shipping zip codes for each of the areas you plan to ship to.

Screen Shot 2016-02-25 at 5.52.09 PM

You also have shipping rules that you can create, here are some of the examples that they provide:

  • If a total cart is above $50, shipping is free.
  • If a total cart is between $10 and $20 shipping is $5.
  • If the total cart weight is over 10kg (22lbs) then shipping is free.

Overall we found the Better Shipping app worked just great to finally let us set our shipping rates by zip code, we recommend it!

Things to Consider Before you Launch Your Online Store

You are ready to sell your products online and want to get started, but where to begin? Are you the manufacturer of your products or are you planning to resell someone else’s products?

Creating Your Own Brand

If you have your own product that you manufacture it’s much easier to get started selling online. For example if you create custom jewelry and want to sell that through your online store, you are able to set your own price because you know how much it costs you in time and materials to make each piece. With your own product not only can you control pricing, but you control inventory. If you are the manufacturer, you know how much product you need (or have a good idea) during your busy seasons so you can stock up and be prepared when the rush hits. When you manage your own brand, there is no limit to the different types of advertising you can try, all of the following could be appropriate and work well: newsletters, pay per click advertising, content marketing, email outreach and much more.

Becoming a Reseller

You can resell another manufacturer’s products online, but you have to understand the rules of their wholesale arrangement. There can be a number of stipulations/rules with a wholesale agreement, here are some examples:

  • You are only allowed to use certain photos on your site
  • You are limited to certain types of advertising
  • There are pricing restrictions, both floors and ceilings that you must abide by
  • Inventory restrictions, you may be limited on how much product you can sell

If you can successfully navigate the rules for a reseller there is plenty of money to be made. It’s worth testing out a few different manufacturers to see which ones stand behind their product and do what they say they’re going to do. After a while if you develop a level of trust, being a reseller is a great way to create a business online.

Don’t Send Your Traffic to a 3rd Party

I got a call yesterday from someone that was just getting started with selling online. They had a created an account at a popular t-shirt site, TeeSpring and were starting to send traffic to their Teespring.com/store URL. They had created a Facebook advertising account and were sending Facebook traffic directly to their TeeSpring URL. This person asked me why did I think the traffic they were sending wasn’t converting? I told them the number one issue was that they were sending traffic to a 3rd party site and not to their own brand. Why is that an issue? I could see on the top of the landing page, there were plenty of links to the main TeeSpring site and once a customer is off your landing page, they are going to navigate the store and buy shirts from other sellers. You are helping TeeSpring by driving sales to their main site and doing very little to build your own brand.

Use Your Own Domain Name for Your Online Store

If you are creating your own product or plan to be a reseller, it’s an absolute must that you register your own URL. We recommend using GoDaddy as a registrar, they are easy to work with and have a simple interface for controlling your domain name.

Where can you find Dropshippers?

Looking for a product to sell? The first place to start is by using Google, searching for products you like and then clicking on the company website to find out if they offer wholesale arrangements. There are also 3rd party sites that specialize in aggregating dropshipper information, here are a couple:

Looking for Excess Inventory or Liquidation Sites?

Another option is for you to purchase excess inventory or find inventory that a retailer no longer wants and purchase it at pennies on the dollar. There a number of sites that have sprung up to accommodate the excess inventory market, here are a couple that we like:

Any questions on how to get started, drop us an email or give us a call and we can help!

Websites for Seattle Area Dentists

A great friend of mine Justin was in the process of buying a new dental practice and he knew that they needed a brand new website. The old site was built in the late 1990’s and it showed! It was your typical brochure ware with limited content and the design was outdated. After a few discussions we agreed that a new site was needed and to do this right, we needed a custom design.

Initial Website Planning

When customers come to their site for the first time, we wanted to show off the building, the landscaping, and most importantly what it looked like inside the office. We wanted potential customers to also see the dentists so they can get comfortable that these are real people in a great location. Before we started on the design we needed high quality photos! Justin’s wife Jenny took most of the photos and as you can see below in the design they came out great.

Logo Design for Dentists

Their old logo wasn’t indicative of their business and we needed something subtle and more modern.The final logo is shown below in the top left of the home page and it came out great!

Custom Website Design for Seattle Area Dentists

We didn’t want a cookie cutter site for Issaquah Dental Arts, we wanted something that really stood out and conveyed quality. Issaquah is a well to do community in the eastern suburbs of King County and it was important that our site be very professional looking to cater to their potential customers. I worked closely with my designer to get inspiration from other sites, but really create something visually appealing, yet unique. When we created the initial home page design we showed Justin and he was very happy. There were a few tweaks we needed to make (the video on the right hand side was added later) and the top navigation sections went through a few different iterations until we finally settled on the look we all liked. The output of the home page design was an Adobe Photoshop file that then could be coded into CSS and HTML.

Dental Procedure Pages

The dentistry offered many different types of services, everything from teeth cleanings, cosmetic work, implants, pediatric dentistry, fillings, oral cancer screenings and crowns. It was important to explain the work that Issaquah Dental Arts could provide so we created discrete pages for each of these services. There is also a lot of technology in their dental office, they have a digital X-Ray system, a Digital Impression system for capturing the shape of teeth and most importantly an in office crown system so that you can get your porcelain crown done in just one visit (normally it’s 2, one for the temporary and another visit for the permanent one).

Dental Patient Forms

A new patient form is typically very long and can take you 20-30 minutes to fill out the first time. This is aggravating for the user and it generates more paperwork for the dentist office. The goal was to create an online form so that users could fill out the information at home prior to their first visit and once the data is submitted Issaquah Dental Arts was able to log the information digitally and cut down dramatically on the amount of paperwork they were generating. This project was a huge success as it saved a lot of time for the dental office and a lot of trees as they reduced the amount of paperwork that needed to be stored.

Bakery Web Design

When we received the call from a local bakery that they were interested in revamping their site, we were excited to discuss their project and find out if Ambaum could help. I set up a call with Kim, the main website contact at Seattle’s Favorite and we discussed a plan to design an eCommerce site so they could sell to both retail and bakery wholesale customers at the same time.

During the initial planning and scoping meetings, Kim and I determined that before we could get started on the new design, we needed awesome product pictures. Kim volunteered to take those pictures and they turned out great!

Once we had the pictures we set out to create a very simple design that uses a lot of white space to really show off the great product images. You can see the bagel product images, gourmet cookies and muffin top pictures (see image below) all turned out great and fit in nicely with the new design.


WordPress for Bakeries

Now that the design was nailed, it was time to turn our attention to the platform we were going to use for the site. We love WordPress as it allows our customers to update bakery items and product descriptions within the text editor, rather than having to get in there update html, css, php and all of the programming languages we use to create sites. WordPress was very easy for us to apply a custom design and it was the logical choice for us to build this new bakery website.

WooCommerce for Bakeries

WordPress was our answer for the core platform, now we needed an eCommerce platform! The obvious choice was to use WooCommerce as it integrates nicely into WordPress and allows us to do a number of customizations to the site. The plan was always to allow wholesale bakery customers to log in to the site, review products and purchase orders. There was also the need to have potential wholesale customers apply to become a wholesaler and then we needed a form (we use gravity forms for all our forms, and we love it) called the wholesale application form for their final approval. There was going to be a lot of customization and the way to do that was with WooCommerce Plugins.

Bakery eCommerce for Retail Customers

For retail customers, the goal was to show them an overview of all the different baked good categories when a user first entered the store. At the highest level these category pages need to show customers a large beautiful image of the product and also show the customer how many individual products were located in each cookie category (for example).

shop

Once the customer clicks on a category they can see all the products listed (an example image is the first one used in this post). After you click on a product, you land on the product detail page, in the example below this is the product listing page for 10 grain honey bagels:

product-bagel

Wholesale Experience for Bakery Customers

Retail customers get to see the full price of each item, but when a wholesale customer logs in they needed to see a $0 price for all items. Seattle’s Favorite wanted to keep their billing process intact and apply the wholesale customer’s unique pricing when they sent the invoice via Quickbooks. In addition, wholesale customers have multiple locations so we created a location field to go along with each order. When Seattle’s Favorite receives the order they can now see the physical location of the wholesale customers, this was very valuable especially for customers that had 10+ stores.

Custom Web Design for Cupcake and Bakery Websites

Are you looking to take your cupcake business online and create an eCommerce store? How about your bakery, is it time you started shipping your cakes throughout the country? If you want to learn more, send us an email or give us a call, Ambaum would love to help!

Email Trouble? Mandrill Is the Answer to Your Company’s Email Woes

When we built Content Runner, from the start we were sending a lot of emails to customers that signed up on the platform. Users and writers need to communicate frequently and the first thing we did was setup an internal email system. Over time as our user and writer base grew, the emails on the system grew significantly. The types of internal emails that we were sending could be organized into the following buckets:

  • Messages on the Content Runner system from users to writers
  • New user drip emails
  • Transactional emails
    • Status updates for projects
    • Reminder and past due notices for projects
    • Proactive alert emails to let users know if the system flagged a potential problem with their order
    • Check-in emails to communicate with brand new users and offer advice on how to use Content Runner

As the email volume grew significantly we noticed issues popping up from both writers and users. Some writers would let us know that they weren’t receiving status emails and some users would complain that when they signed up they never received the welcome to Content Runner email. We realized this was a huge problem, but we weren’t sure how to solve it.

Initially we recognized that certain email addresses were getting blacklisted by our server. There is a process to go through and white list a domain name and we tried that and it helped solve problems with a few customers. However there was another issue very difficult to solve, what about the people that never receive emails, but never contact you to let you know? That was the one issue we couldn’t figure out because we didn’t have any email deliverable metrics to see which ones were working and which ones were bouncing. We knew there had to be a better way to solve this problem and after much research we settled on Mandrill.

Mandrill is Mail Chimp’s Answer to Internal Emails Problems

When we started looking into Mandrill we knew there would be a lot of work to move our email templates (we had close to 60+ different emails we were sending), but we were hopeful that this would help solve all of our email issues outlined above. It took Matt, our primary programmer on Content Runner, close to a week to recreate all of our email templates and move over everything to Mandrill. Then we flipped the switch and cut over to Mandrill for all our internal emails and it’s the best move we ever made, email problems are now a thing of the past.

You can see here from the list of Mandrill features that they have servers located all over the world with their own IP addresses (this is important) and they are experts at navigating the many trust issues that pop up between IP addresses and servers. We only send emails from the ContentRunner.com domain name, but with Mandrill you can send emails from multiple domain names under the same account.

Mandrill is very affordable you can send up to 25,000 emails a month for only $9.95. You can scale very affordably with them as well, if you grew to send 100,000 emails a month that would only cost $24.95, here is more information on Mandrill pricing.

My favorite Mandrill feature is the ability to view outbound emails. I have this tab open in Chrome all day so I can view the messages sent between our users and writers.

Mandrill Activity

This has been a huge source of inspiration for new features, when we see that users or writers are looking for something we don’t have built into the Content Runner platform we can prioritize that feature. Back when we were sending our own emails on our VPS, we had zero insight into the communications between our users and writers.

In addition, I now have the comfort of seeing that an email went through! I love it when I see that green “Delivered” status next to most all emails and I can see the overall deliverability metrics – 99.3% in the picture inserted above.

Mandrill for WordPress

You can also use Mandrill on your WordPress blog to send email. You will need to create an API key so you can authenticate to your Mandrill account, but you don’t need a MailChimp account (though I would suggest you create one!).

Mandrill for WP is a very handy option if you have already set up your WP site and don’t want to do a custom API integration like we did with Content Runner. Installing a plugin is a snap and if you run into issues check out their FAQ here. Also if you have setup templates in MailChimp (we do this often) then you can use those same templates on your WP site for emails, if you install the plugin.

Any questions on how to install Mandrill on your site, let us know and we can help!

What is the Google Merchant Center and How can I Create my First Product Data Feed?

If you run an eCommerce store online, there’s a good chance you have heard of the Google Merchant Center. If you haven’t heard of it, the Merchant Center allows you to upload your products and make them available for sale via the Google Shopping channel.

Why Should I Care about the Google Merchant Center?

For starters, when you create a product feed in the merchant center, you get access to people that are using the Google.com/shopping platform to find products. However there is another benefit that I think is even more important, once you have created your data feed and been approved, you also have an opportunity for your product to show up in Google.com search queries. Here’s an example to show you what I mean, take a look at the screenshot below:

screenshot1

Seattle-Cedar.com is a site owned and managed by Ambaum. We have a regular AdWords search campaign and you will see that result showing up in spot #1. Also you can see that there are number of listings over to the right with product images. These images show up very commonly when you do a search for a particular product. You can also see that Seattle-Cedar.com has an entry there up in the top right – that result is showing because that product was included in our Google Merchant Center data feed.

What is a Product Data Feed?

Setting up your first feed in the Google Merchant Center can be a bit intimidating if you have never worked with a data feed previously. However if you dumb things down a bit (which I love to do), then you realize that a data feed is just a way to present your product data in a simple format. There are many ways you can create your product feed:

  • .txt (text file)
  • .csv (tab delimited file)
  • .xml (XML feed)
  • .gz (compressed text or XML)
  • .zip (compressed text or XML)
  • .bz2 (compressed text or XML)

For the purposes of this blog post we are going to walk through the creation of a product feed with Excel and saving the file as a .CSV (tab delimited). You can setup your feed to automatically be fetched from you’re your website via XML or via a JSON API, that would require programming work to setup, send us an email if you want to learn more about how to automate your product feed.

How to Create Your First Product Data Feed for the Google Merchant Center

Google recommends using a spreadsheet program such as Microsoft Excel or Google Sheets to create your CSV file, I will be using Excel in our example below. There are a number of fields that are mandatory for your data feed and even more that are optional. For the complete instructions on how to create your product feed, here is the Google Merchant Center help link.

I created a CSV file with a sample of 8 products (the rows in the image below). I used the following fields in my CSV file (the column headers)

  • id
  • title
  • description
  • price
  • product_type
  • google_product_type
  • brand
  • mpn
  • condition
  • link
  • availability
  • image_link
  • additional_image_link (optional)
  • additional_image_link (optional)
  • additional_image_link (optional)
  • additional_image_link (optional)

You will need all of these fields for your product feed to be approved by Google with a couple important exceptions:

  • I added 4 additional images, you can see those files showing up in the columns titled: “additional_image_link”, these are optional images I wanted to include for each product.
  • I did not include tax information in my product feed, I created a master record of my tax information and loaded it into my account under: “Settings”, then click on “Tax”. There is a separate guide to uploading your tax settings, review that here.
screenshot2

Here is more information about each of the mandatory fields:

  • Id – I created my own custom id for each project and tracked it in a separate spreadsheet I use for pricing.
  • Title – a simple, yet descriptive name for each product.
  • Description – I kept this to 2 or 3 sentences and focused on the products + our staining process.
  • Price – very specific formatting requirement, it must be like this: 299.00 USD
  • Product_Type – I think of this as the breadcrumbs or product hierarchy. It was easy for me to create this since we already created our site w/ this concept, here is an example: Home > Products > Bridge
  • Google_Product_Category – Google has created a taxonomy for all physical products, here is a link to their categories (I used “ctrl + f” to search for my products).
  • Brand – very easy for us the name of our company: Seattle Cedar
  • MPN – finding the manufacturer’s product number took a bit of digging, but was easy when I looked back our order forms.
  • Condition – new, all of the items we sell are brand new to the customer
  • Link – URL of the product page where the item can be purchased
  • Image_Link – URL of the primary product image
  • Additional_Image_Link – additional images for each product

Once you load up your product data feed, you will receive an error report. The first time I did it, left off my Brand and MPN and tax information and had to re-upload the file. After I fixed the issues and re-uploaded the file I received a message that all 8 products were added successfully. I thought I would be off and running, but then you have to wait to get your products reviewed by a live Google employee. I uploaded my final feed on a Thursday and on Sunday my first product was reviewed. It then took all day Monday for the final products to be reviewed, so make sure you leave enough time for Google to do their review of all your products, especially if you have a large data feed and are doing this for the first time.