When starting your online business, there are many things to consider. One of the most important decisions you will make is which platform to use to create your online store. Shopify is one of the most widely used eCommerce platforms for many reasons, but one of the main reasons is how easy it is to get your store up and running.
When you sign up for Shopify, you are given a free 14-day trial so you can experiment with the interface. This trial period is great for testing out themes, adding products, and testing apps before committing to using Shopify. After the trial period, there are three different plans that Shopify provides.

- Basic Shopify– This plan has the cheapest monthly rate and comes with the least amount of features, but could be the best plan for you when starting your shop if you are not ready to fully commit to Shopify.
- Shopify – This is their standard plan that comes with additional features like Abandoned Cart Recovery which allows you to see which customers had products in their cart, but didn’t go through with the checkout process.
- Advanced Shopify – This is the plan that has everything. This plan comes will all of the Shopify features and is great if you are selling and shipping products in high volume.
There are other plans that are available if you have specific needs for your shop, but these three are the most commonly used. Here is a full list of the pricing plans and the features they come with.
Once you have selected your plan, whether it is the free-trial or you have decided to commit to Shopify and go with one of their paid plans, there are a few more steps you need to take to get your store up and running.
Select a Theme
By default, your store comes with a barebones theme called Launchpad Star. However, you might want to select a theme that has already been developed and comes with built in features that will make it easier for you to change things like color and layout. There are so many Shopify themes available that it came seem a little overwhelming when you look and see how many there are. However right off the bat, you can decide whether you want to use a free theme or a premium(paid) theme. The free themes are great and will work as a quick and easy way to make your shop look presentable, however most of them don’t come with all of the bells and whistles of a premium theme. You have to pay for the premium themes for a reason. Most of them come with support and have a lot more features than the free themes.
Once you have selected a theme, you can start adding products to your site.
Adding Products
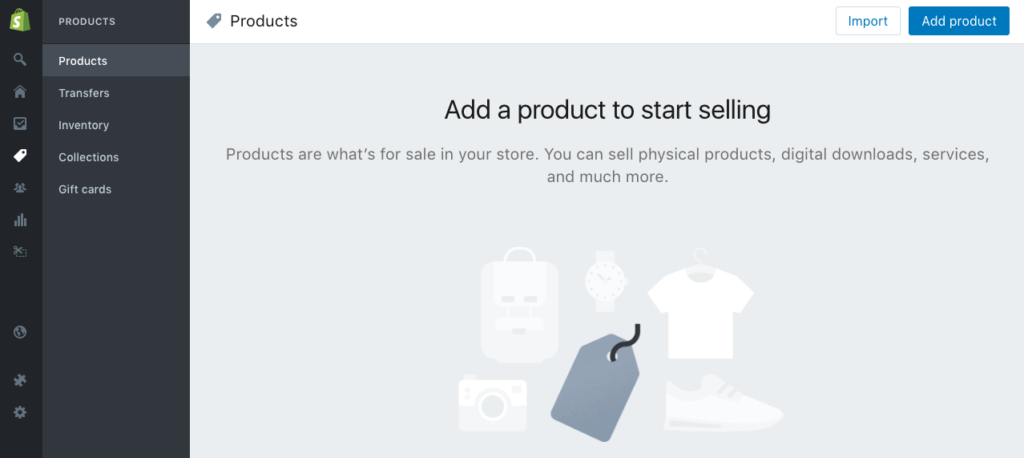
Now comes the fun stuff! Adding products to your site is easy with Shopify. You can create collections, or categories for your products to make it easier for your customers to find what they are looking for. You can also add variants for different colors, sizes, prices, etc. for your products. When adding products, make sure to fill out as much of the information as possible because it will make everything easier for you down the road once you start selling products and you have to track inventory, adjust shipping costs, or any of the many things that can change as your business grows.
Now that you have added some products for your customers to purchase, we can get into some of the more complex aspects of Shopify.
Installing Apps
Shopify Apps are tools that other developers have created to make your life in Shopify easier. Much like the themes, some of them are free and some you have to pay for. There are apps for marketing, shipping, social media, pretty much anything you can think of for your store. As you are searching through the apps, be sure you know the cost of the app. Some of the apps list a price range or provide a free trial and then charge you after the trial is up.
Viewing Your Shop
Once you have your theme, products, and apps installed on your store, you can go to your shop see what it looks like. Assuming you haven’t added a custom domain and your shop is still in test mode, you can view your site by clicking the button at the top of the dashboard navigation next to the Shopify logo. Shopify will provide you with a domain for you shop, something like shop-name.myshopify.com. Don’t be alarmed when your shop doesn’t look quite like you want it to! You can make a lot of customizations on your own in the dashboard without having to do any coding.
Customizing Your Theme
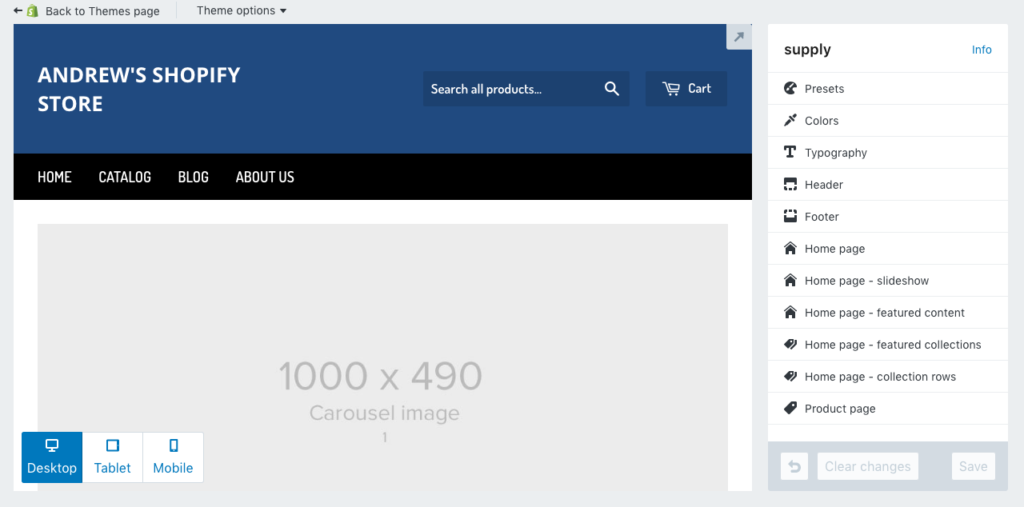
Now that you have seen your shop and the framework for what it will look like, it is time to make some basic customizations. In the Shopify dashboard, you will need to navigate to the Customize Theme section. To get there, select the Online Store button from the left menu, then click the Themes link. You will see a preview of your theme with some options above it. Click the Customize Theme button. Here you can set colors, add a logo, and make several more modifications to your site. Each theme is different so you will have to click around to see what you are able to customize. You can also install new themes without losing your existing products and apps so don’t hesitate to try a new theme if you feel like you might not like the theme that you initially chose.
Launching Your Store!
The moment has finally arrived! You are ready to start reaping the benefits of your hard work and selling your products to the masses!
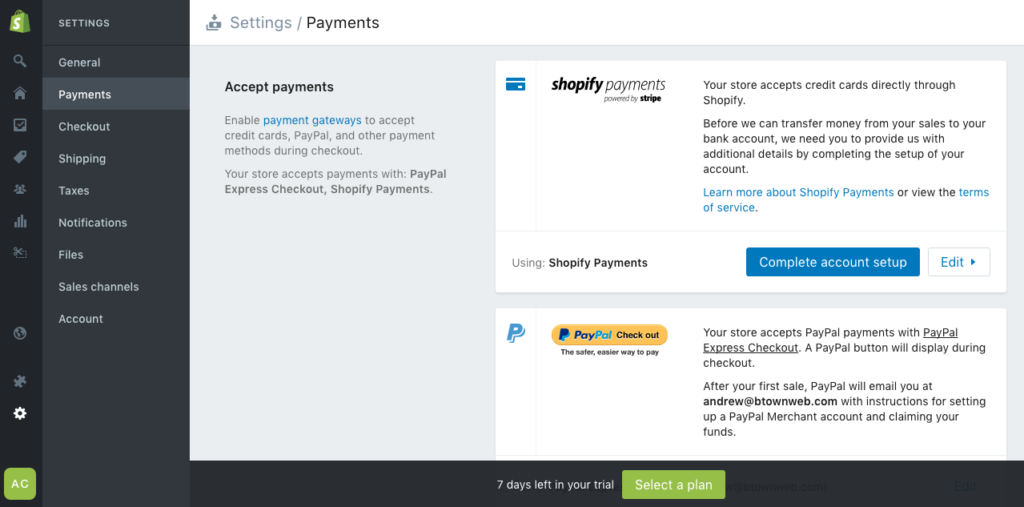
First though you do need to go through the final set up process with Shopify. Click on the Settings button on the main Shopify navigation menu. Here you will see a list of all of the different settings that are preset on your site. We would highly, HIGHLY recommend going through each of these settings and at least taking a look to make sure that the information is correctly filled out. After you have ensured that you have the correct information entered, you will need to decide whether to use a separate payment processor, or Shopify payments. If you use another payment processor, you will need to set up an account with them and tie it to your Shopify store. If you decide to use Shopify payments, you will need a checking account where Shopify can deposit your revenue. Ultimately the decision is up to you, but using Shopify payments makes things a little bit easier as you won’t have to manage a separate payment processor, it will all be managed under your single Shopify account.
Once you have set up your payment processor, you are one step closer to selling your products and services online! You will need to take your shop out of test mode in order for customers to finalize the transaction. To do so, you will go back to they Payments section under Settings and make sure that the Test Mode button is not checked.
Setting a Custom Domain
Now that you can actually sell products, there isn’t anything else that you HAVE to do immediately. However we definitely would recommend using a custom domain as it makes your website more identifiable and makes your business seem more professional. To set your custom domain, you can either register through Shopify or through a separate registrar like GoDaddy. Once you have decided who your registrar is going to be, click the Online Store button again in the dashboard and select Domains. Here you can either purchase a domain, or add a domain that you have already purchased through a separate registrar. If you are adding a domain you have already purchased, you will need to set the DNS to point to your Shopify store. To do so, follow the instructions provided by Shopify. You may need to contact your registrar as well for instructions on how to update the DNS. Once you have updated the DNS, it can take up to 24 hours to propagate, but is generally much faster than that.
Selecting Your Plan
This is the final step in getting your shop set up. You will need to select a Shopify plan. If you go to Settings>Account in the dashboard, you will see where you can change your plan type and add a credit/debit card. Once you have selected a plan and entered your card information, that’s it! You are ready to go and can start selling to customers!
Although your shop is set up and accessible online, there is so much more that Shopify can offer to enrich your customer’s experience. It would take a year’s worth of blog posts just to scratch the surface of what Shopify can do. As Shopify Experts, we are here to help you unlock the full potential of your store. Just go to our Shopify page and let us know what it is that you need!


